LOOPS Portal
Teachers
To set up an account:
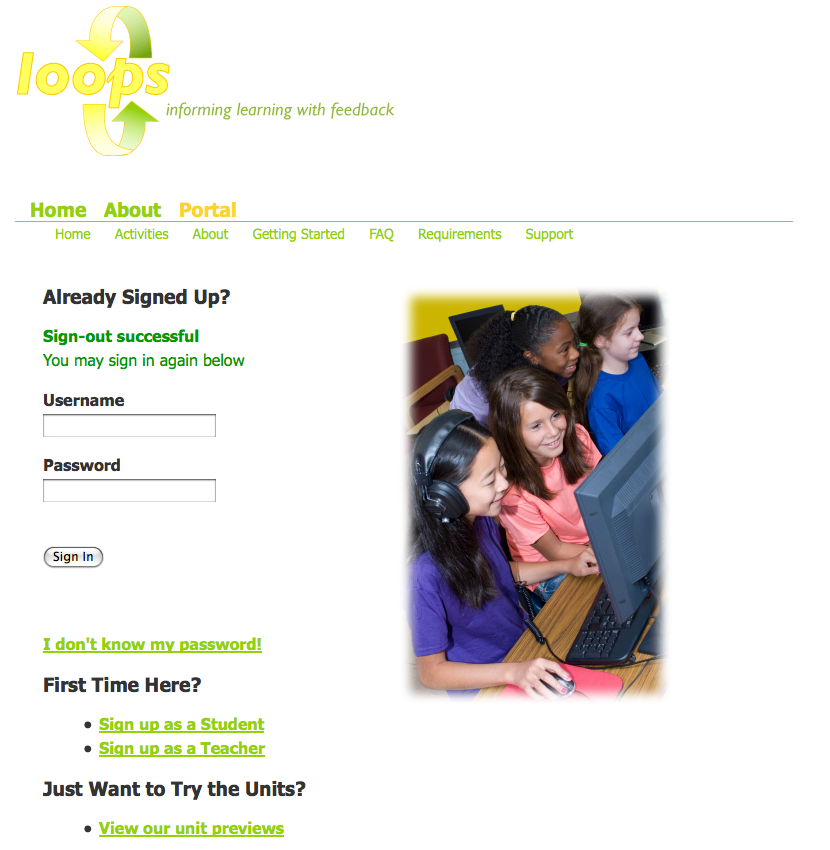
1. Go to http://loops.portal.concord.org/ and click "Sign up as a Teacher" (see Pic1)
2. Follow the instructions and fill out each form
3. Go back to http://loops.portal.concord.org/ and sign in
Pic1
To set up a class:
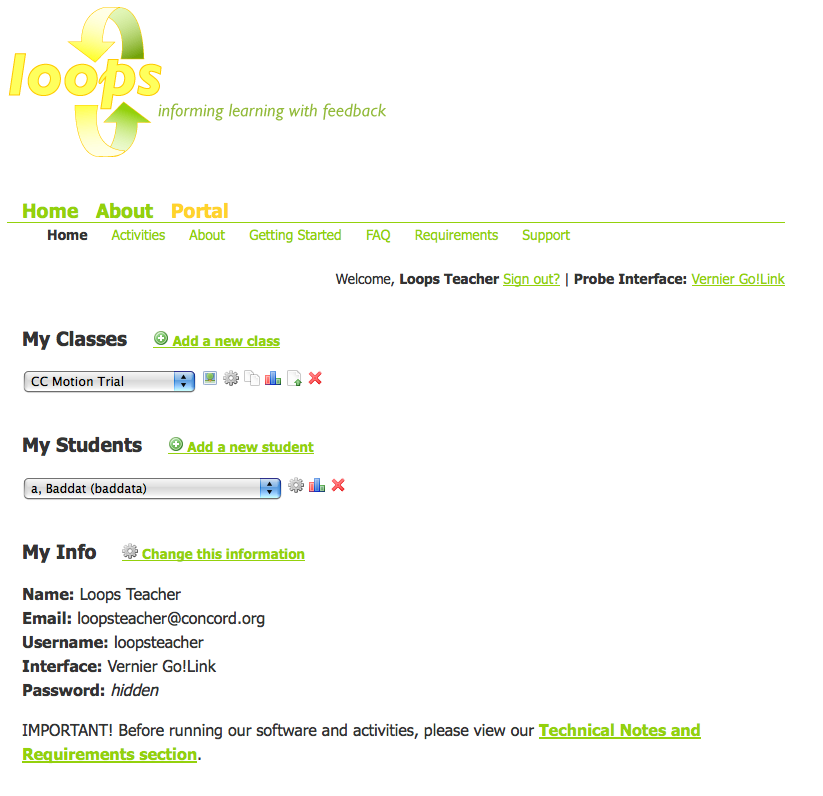
1. Sign in and click on "Add a new class" in "Portal: Home" (see Pic2)
2. Fill out the information and be sure to select activities for your students to run
3. Pass out the sign-up word to the students
Pic2
To manage a class:
1. Sign in and go to "Portal: Home" (see Pic2 above)
2. Select a class from the pulldown menu
3. Pick an action (see details below)
The buttons under "My Classes" are (from left to right):
1. Preview - this lets you view the activities assigned to that class. Note that since it is only a preview there is no student data saved or any results to release.
2. Setup - click here to change a class's name, semester/year, sign-up word, or activity selections
3. Copy - makes a duplicate of that class
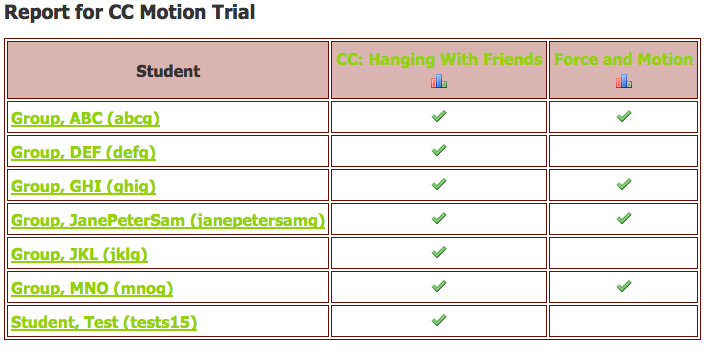
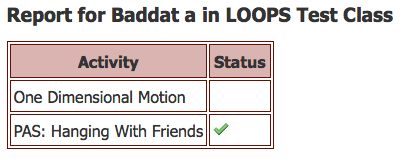
4. Report - shows a basic report of whether the students have run the activity (see Pic3, for more info see "Class Report & Teacher Dashboard")
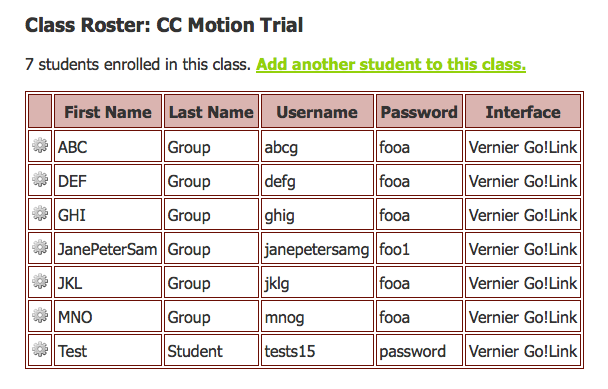
5. Class List - gives all students signed up for a class (see Pic 4)
6. Delete - removes a class (WARNING: cannot be undone!)
Pic3
Pic4
To manage students:
1. Sign in and go to "Portal: Home" (see Pic2 above)
2. Select a student from the pulldown menu
3. Pick an action (see details below)
The buttons under "My Students" are (from left to right):
1. Setup - click here to change a student's name, grade level, password, probe interface, or class selections
2. Report - shows a basic report of which activities the student has run (see Pic5)
3. Delete - removes a student (WARNING: cannot be undone!)
Pic5
Students
To set up an account:
1. Go to http://loops.portal.concord.org/ and click "Sign up as a Student" (see Pic1 above)
2. Fill out the form and be sure to use the sign-up word for your class
3. 3. Go back to http://loops.portal.concord.org/ and sign in
NOTE: Students cannot combine or share accounts. Therefore, if a group will be using one computer they should have one student account together. If groups change or members are switched around, no work would transfer with them and they would have to join a group in-progress.
Class Report & Teacher Dashboard
From within the Class Report, you can see the small histogram icon above each column. This opens the teacher dashboard for that class and allows the teacher to access the different LOOPing features.
WARNING: If not all of the check-marks are made, showing that some students have not run the activity yet, do not launch the teacher dashboard. Otherwise, only the students who are running the activity will be able to submit work. If you refresh that page that has the class report, you will update your view on who has launched
the activity.
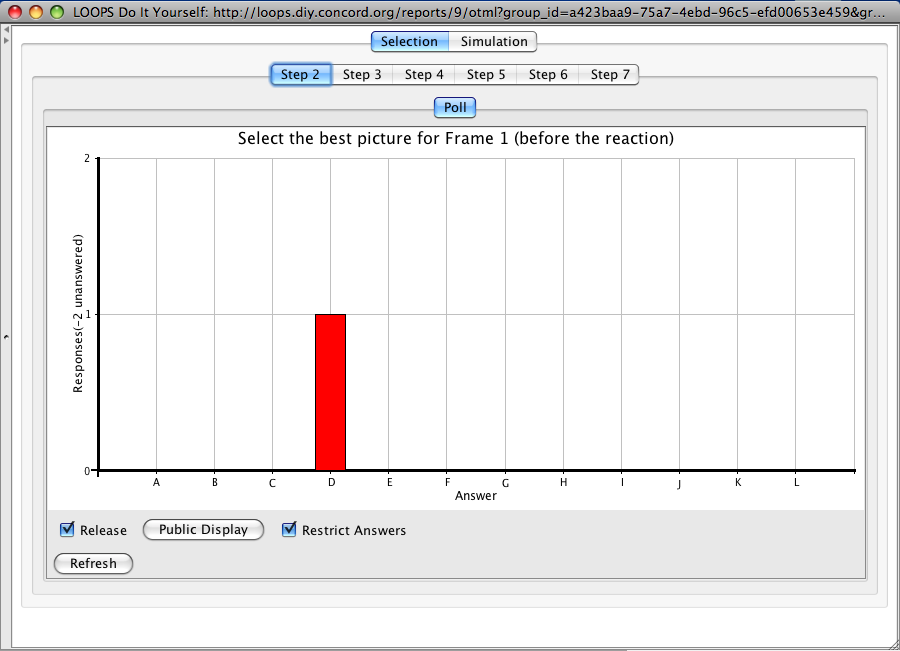
Once you open the teacher dashboard you will see it organized by activity and step (see Pic6, from Exploring the Hydrogen Burn Model S). The first type of question, shown in the previous picture, is a Poll that displays histogram of student responses. The following are the available teacher actions for a Poll:
1. Refresh - clicking this button updates the collection of student responses
2. Release - when checked, sends the histogram to students to see when they hit their "Results" button.
3. Public Display - this pops out a new window of student responses that can be sent to a project or other public display. See more info below in "Second Monitor Setup"
4. Restrict Answers - checking this only lets students who have submitted work to see the class's results (this way, students cannot peek and change their answer to fit what is popular)
Pic6
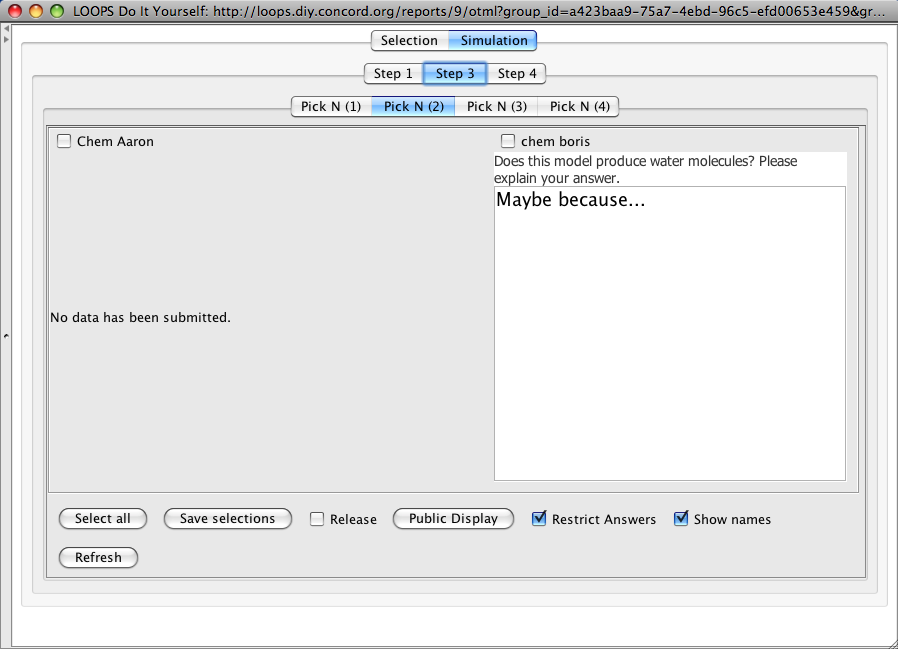
The other type of question is a Pick N (see Pic7, also from Exploring the Hydrogen Burn Model S), where the teacher is given the class's responses and then able to chose which ones to release back to the students. For example, if a group of students are all choosing an interesting but incorrect answer, it may serve the class to display these and discuss what ways the are right or wrong. There is a checkbox next to each student's name for selecting their work, unless the message "No data has been submitted." is displayed. The button/checkboxes available to the teacher are the same as above but also have:
1. Select all - selects all students' work for release
2. Save selections - updates which selections are released to students if the teacher checks off different students after a release
Pic7
Second Monitor Setup
There are two ways to set up a second monitor:
1. It can "mirror" the first monitor and show the same windows.
2. The desktop is extended so that there are now two spaces for windows to be.
While the first is simple and makes for easy viewing, the second allows for both a "private" monitor and a "public" one. If the classroom has a projector, it can let the teacher show a window to her classroom simply by dragging it over to the projector's space.
For Mac
1. Plug in the projector through the second monitor port. Be sure to have the right adapters if the teacher is using a laptop since this port is different for many of Apple's models.
2. Go to system preferences and open "Displays". Click "Detect Displays" to refresh the settings.
3. You can turn mirroring on or off if the second monitor is on and recognized by OSX. If mirroring is off, go into the tab for "arrangement" to move around where the second monitor is relative to your own screen.
Typical Use-Case (Mirroring Off):
1. Students and teacher log in and then launch the activity.
2. Teacher opens up class report and teacher dashboard/report (and activity, if desired) on laptop monitor.
3. As student answers are released, the new windows will open on the laptop but can then move the windows to the projector's space for class-wide viewing.
4. Answers are left up if they are reminders, removed if they are distractions, or changed as new answers come in.
While teachers will obviously tailor their use to meet the classroom's needs, this should capture the essence of what a second monitor can do.