This page explains how to use potrace to trace a color raster image.
Inkscape uses this technique with potrace to do its color raster tracing.
This page has an example of the output from inkscape:
Tracing Color Raster Images
However that trace has problems because of the antialiasing in the image.
First the antialiasing is removed using the technique on this page:
Removing Antialiasing
Then the image is color quantized using the instructions at the the bottom of this page:
Tracing Color Raster Images
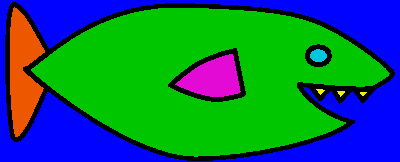
Here is the resulting image that we'll start with:
Here is what it looks like after being traced with stack off. The color regions have also been broken apart.
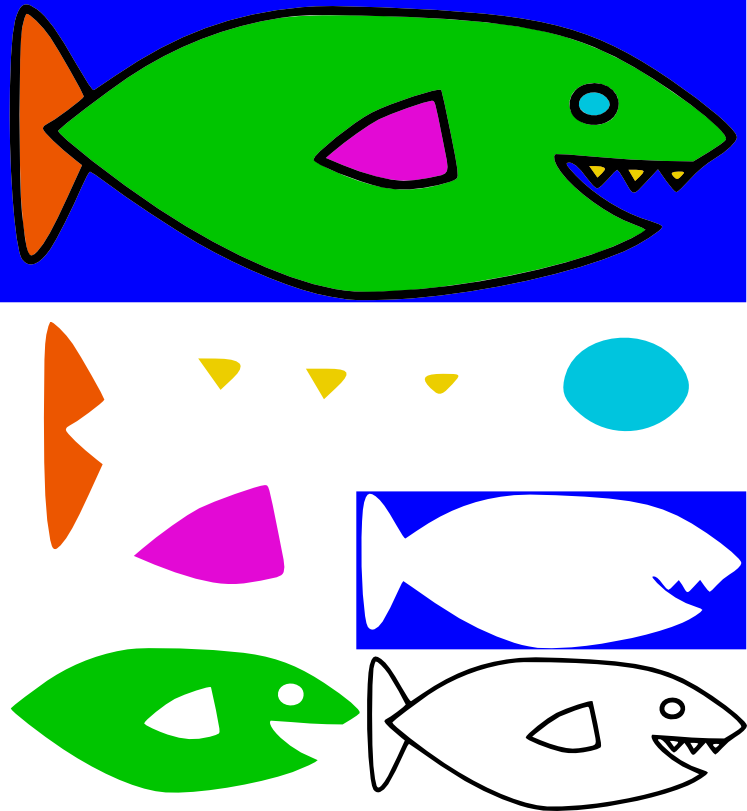
| There is a bug in the inkscape color tracing code. When the number of scans is set to be equal to or greater than the actual number of colors in the image, weird colors show up, and they vary on each trace. So to actually generate this image with Inkscape I traced it with one less color and then added in the last color manually. In this case the last color was the yellow in the teeth |
Notice that in the paths above there is still a lot of redundancy. Every edge between the regions is represented twice: once by the black outline and again by the color. Not only does this cause an increase in size, it also causes gaps in the images. For example here is a zoom in on the lines of the fin after they have been traced:
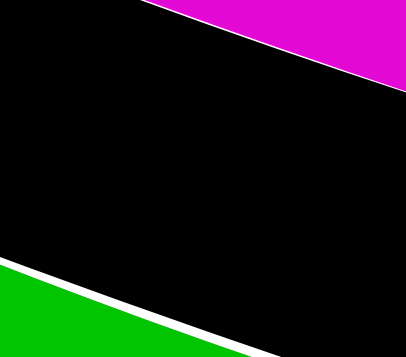
In this case you have to zoom in pretty far to see the gaps, but in other images with more curvy lines they are more noticable.
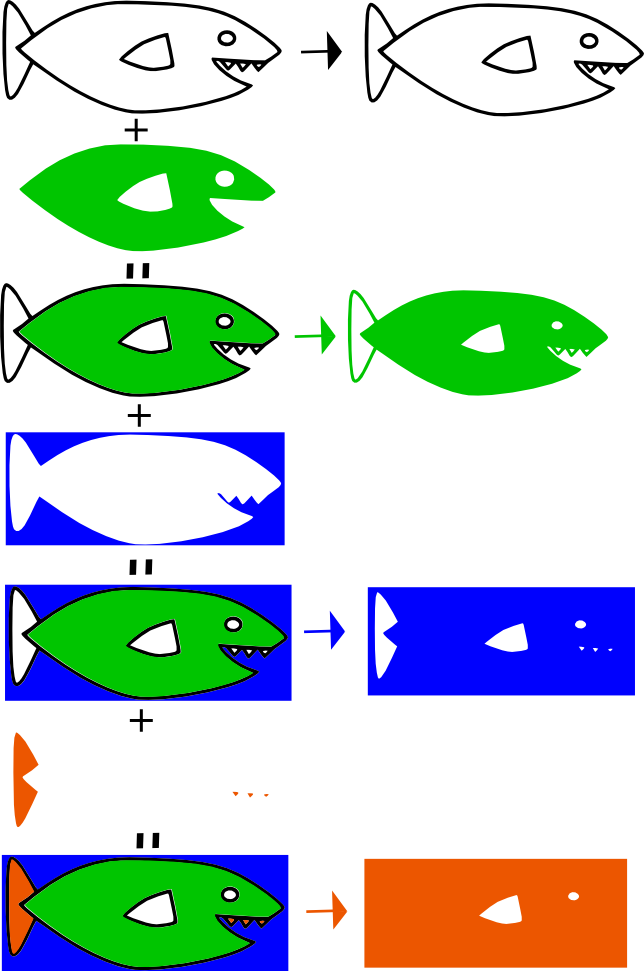
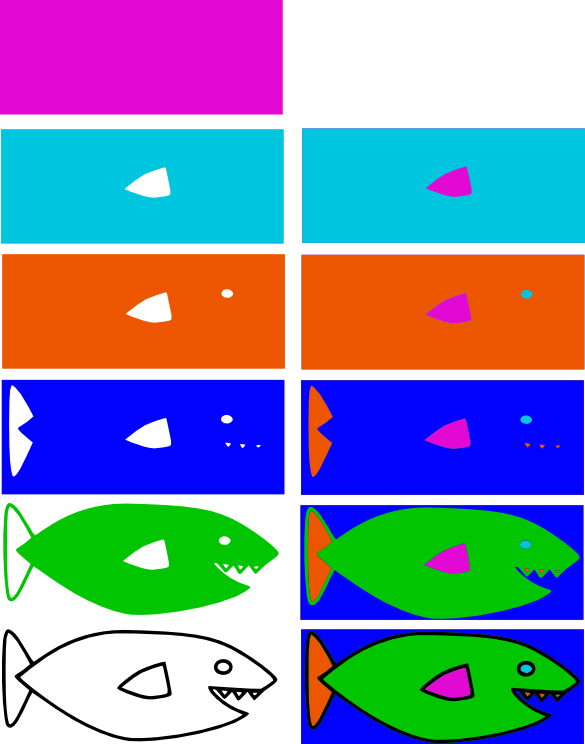
The solution that Inkscape uses is to layer the colors on top of one another. This elimnates gaps, but when it is done in a random order it actually increases the redunancy. Here are the layers that Inkscape makes when "stack" is on:

Each layer includes the colors from above it. In this way there will never be any gaps. Because there is always an overlap between two color areas. This could cause something like gaps but with colors. For example when the black layer is put on top of the green layer there might be some spots where the green shows up behind the black where it is not supposed to. I have not found an example of this yet.
How did Inksacpe create these layers? The image below attempts to describe the algorithm with pictures. Here it is in words:
Each layer is the combination of the pixels from all the layers above it. In this case the first layer is black. Then the next layer is green. So the green layer is actually the combination of the black and green pixels in the image. The next layer is blue, so the it is the combination of the black, green, and blue pixels.
Command Line Stacking
The layering or stacking that Inkscape uses is not ideal, so we need more control over that process. Here is a how to do the stacking from the commandline using netpbm commands. It assumes you know the hex format of the colors in the image.
# make mask of a particular color in the input file
mask() {
ppmcolormask "#${1}" $INPUT_FILE > tmp/cmask-${1}.pbm
}

# this is the green color of the fish
COLOR=00c500
# this is the blue color of the fish
OTHER_COLOR=0001fe

# create a mask of the first color in this case green
mask ${COLOR}

# make a mask of the second color in this case blue
mask ${OTHER_COLOR}

# combine the mask with the other mask, this uses the pnmpaste option with the "and"
# option.  pnmpaste treats white is true and black as false.  The ppmcolormask creates
# black areas where the color is.  So anding the images with black areas creates a
# combination of the black areas.
pnmpaste -and tmp/cmask-${COLOR}.pbm 0 0 tmp/cmask-${OTHER_COLOR}.pbm >  tmp/combine-tmp.pbm

# the tmp/combine-tmp.pbm now has the a mask that combines both colors
Inkscape uses the potrace command to do the tracing. potrace only traces black and white images, so once the images above have been created they can be traced with potrace.